
Step 21: Fold the top and bottom points in to meet the centre crease line. Your paper should look like this once folded.

Step 22: Fold the paper in half horizontally, bringing the bottom point up to meet the top

Step 23: Fold the right point up and over, creasing where indicated in yellow

Step 24: Your paper should now look like this
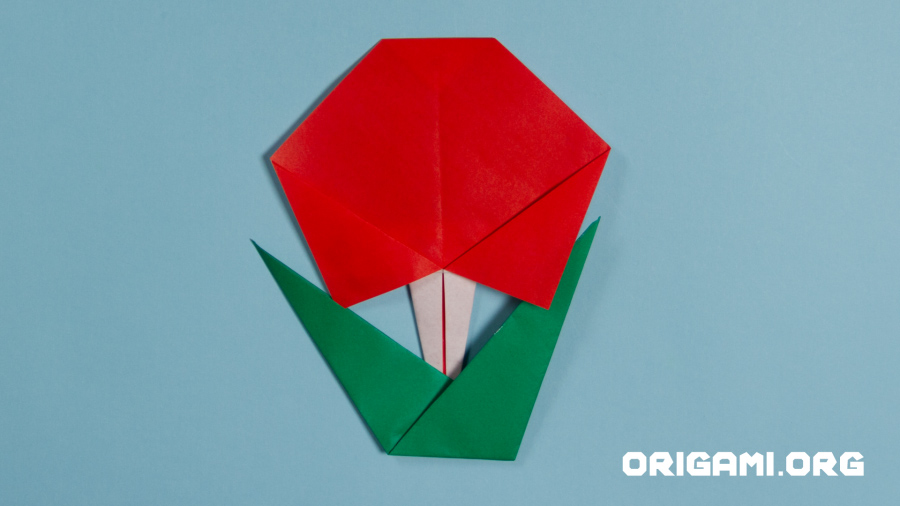
Step 25: Add the head of the rose to the leaves and your beautiful flower is now complete!
Why not make some different sized or coloured roses to create a bouquet?