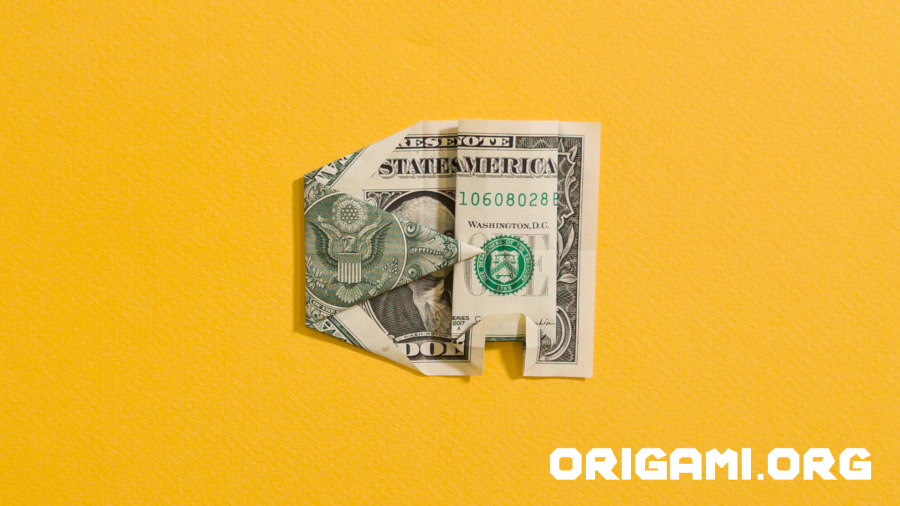
![Dollar Bill Elephant step 21](https://www.origami.org/wp-content/uploads/2023/08/dollar-bill-elephant-step-21.jpg)
Step 21: Once folded and pressed down your dollar bill should look like this – the elephant’s legs are starting to take shape!
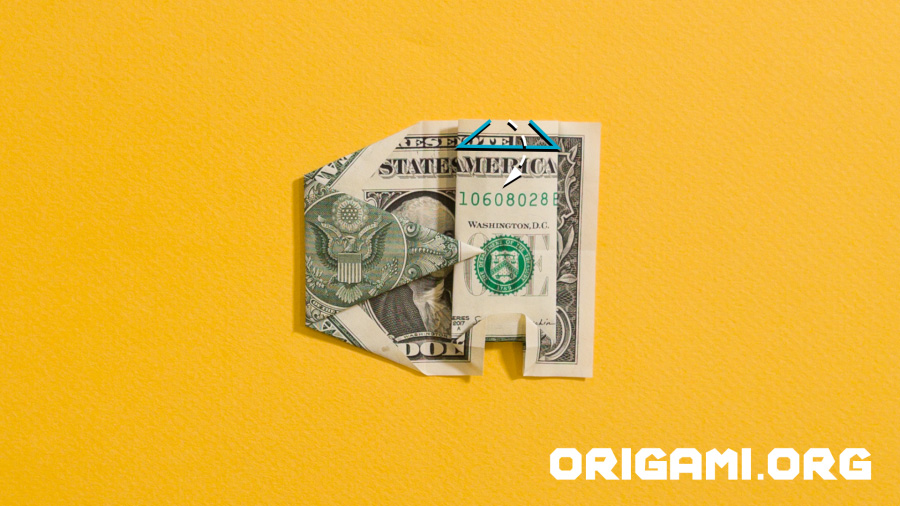
![Dollar Bill Elephant step 22](https://www.origami.org/wp-content/uploads/2023/08/dollar-bill-elephant-step-22.jpg)
Step 22: Repeat step 20 but on the top section of the fold.
![Dollar Bill Elephant step 23](https://www.origami.org/wp-content/uploads/2023/08/dollar-bill-elephant-step-23.jpg)
Step 23: Press down the fold and your dollar bill should look like this
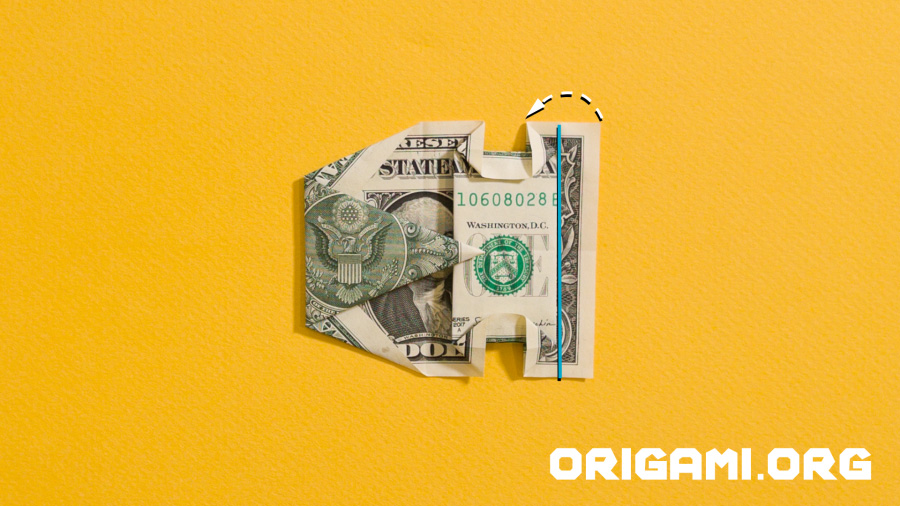
![Dollar Bill Elephant step 24](https://www.origami.org/wp-content/uploads/2023/08/dollar-bill-elephant-step-24.jpg)
Step 24: Fold the right side up and over to the left, creating the crease line indicated in blue
![Dollar Bill Elephant step 25](https://www.origami.org/wp-content/uploads/2023/08/dollar-bill-elephant-step-25.jpg)
Step 25: Your dollar bill should now look like this
![Dollar Bill Elephant step 26](https://www.origami.org/wp-content/uploads/2023/08/dollar-bill-elephant-step-26.jpg)
Step 26: Unfold the trunk (pointed part) of the dollar bill
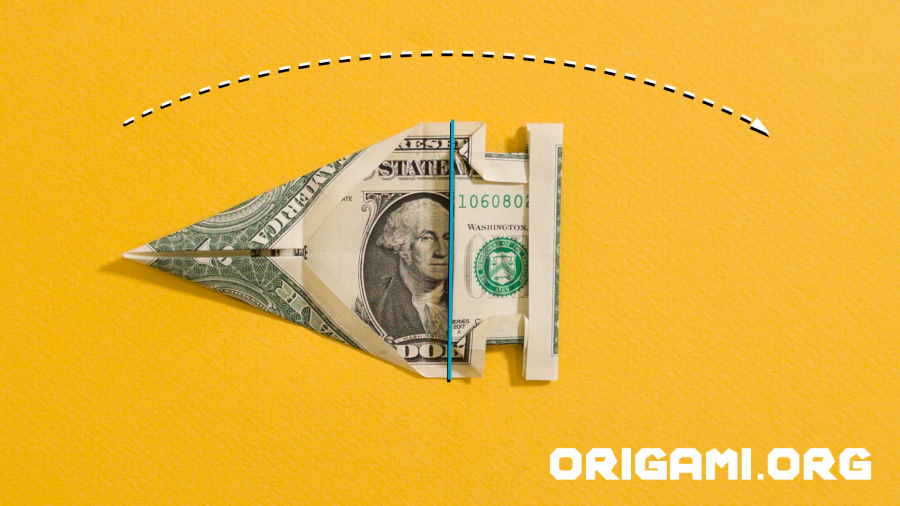
![Dollar Bill Elephant step 27](https://www.origami.org/wp-content/uploads/2023/08/dollar-bill-elephant-step-27.jpg)
Step 27: Fold the trunk up and over to the right, creating the blue crease line
![Dollar Bill Elephant step 28](https://www.origami.org/wp-content/uploads/2023/08/dollar-bill-elephant-step-28.jpg)
Step 28: Press down the newly made crease line and your dollar bill should now look like this
![Dollar Bill Elephant step 29](https://www.origami.org/wp-content/uploads/2023/08/dollar-bill-elephant-step-29.jpg)
Step 29: Fold the trunk up and to the left, creasing as indicated in blue
![Dollar Bill Elephant step 30](https://www.origami.org/wp-content/uploads/2023/08/dollar-bill-elephant-step-30.jpg)
Step 30: Your dollar bill should now look like this